Direct File Imports
Upload files directly to your Milemarker Data Lake with automatic parsing, validation, and type detection. No coding required.
What is Direct File Imports?
Direct File Imports allows you to upload structured data files (like CSV or Excel files) directly into Milemarker's Data Lake. Once uploaded, your data is automatically parsed, validated, and made available for use in dashboards, reports, and workflows.
This feature is perfect for importing data that doesn't come through automated integrations—such as custom reports, supplemental data sources, or one-time data migrations.
How to Access Direct File Imports
- 1 Log in to your Milemarker account
- 2 Navigate to Direct File Imports from the main menu
- 3 You'll see a list of your existing imports, or you can create a new one
Understanding Import Types
When creating a Direct File Import, you'll choose an Import Type that determines how subsequent file uploads are handled:
Each upload adds (appends) new rows to the data already in the database. Use this when you want to accumulate data over time, like adding new transactions or records.
Each upload removes all previous data and replaces it with the new file's contents. Use this when your file represents a complete snapshot that should overwrite old data.
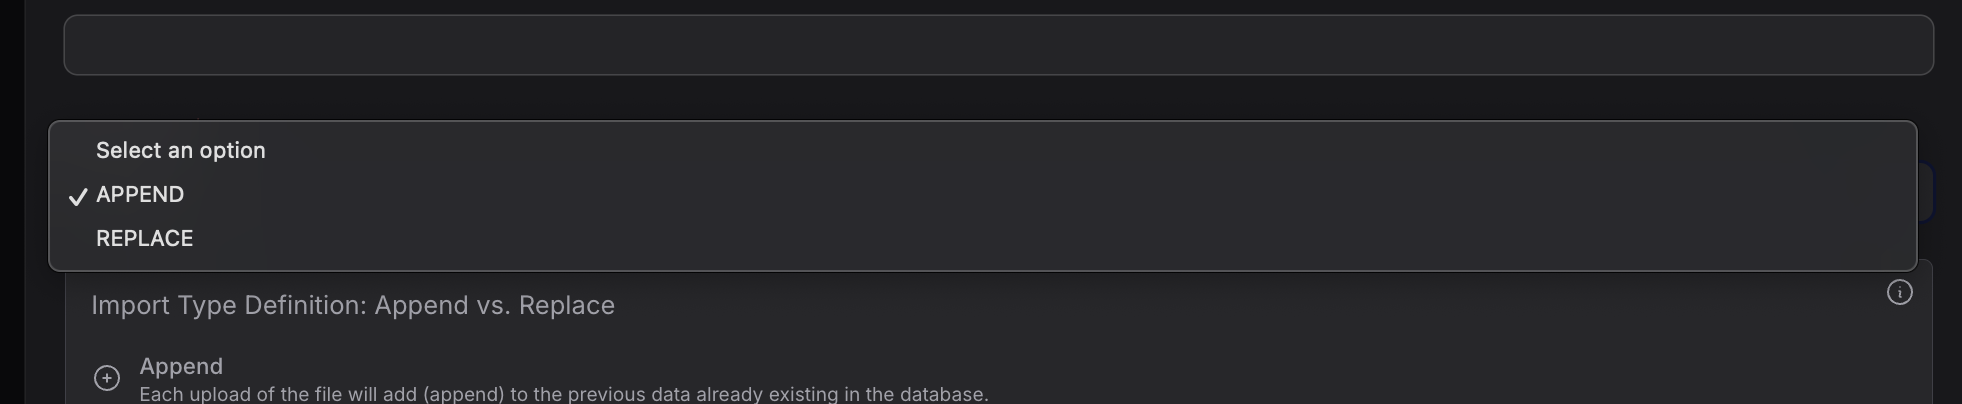
The Import Type dropdown lets you choose between APPEND and REPLACE modes
Creating a New Direct File Import
Follow these steps to create a new import template for your data files:
Enter Import Details
Start by clicking Create to begin the 4-step wizard.
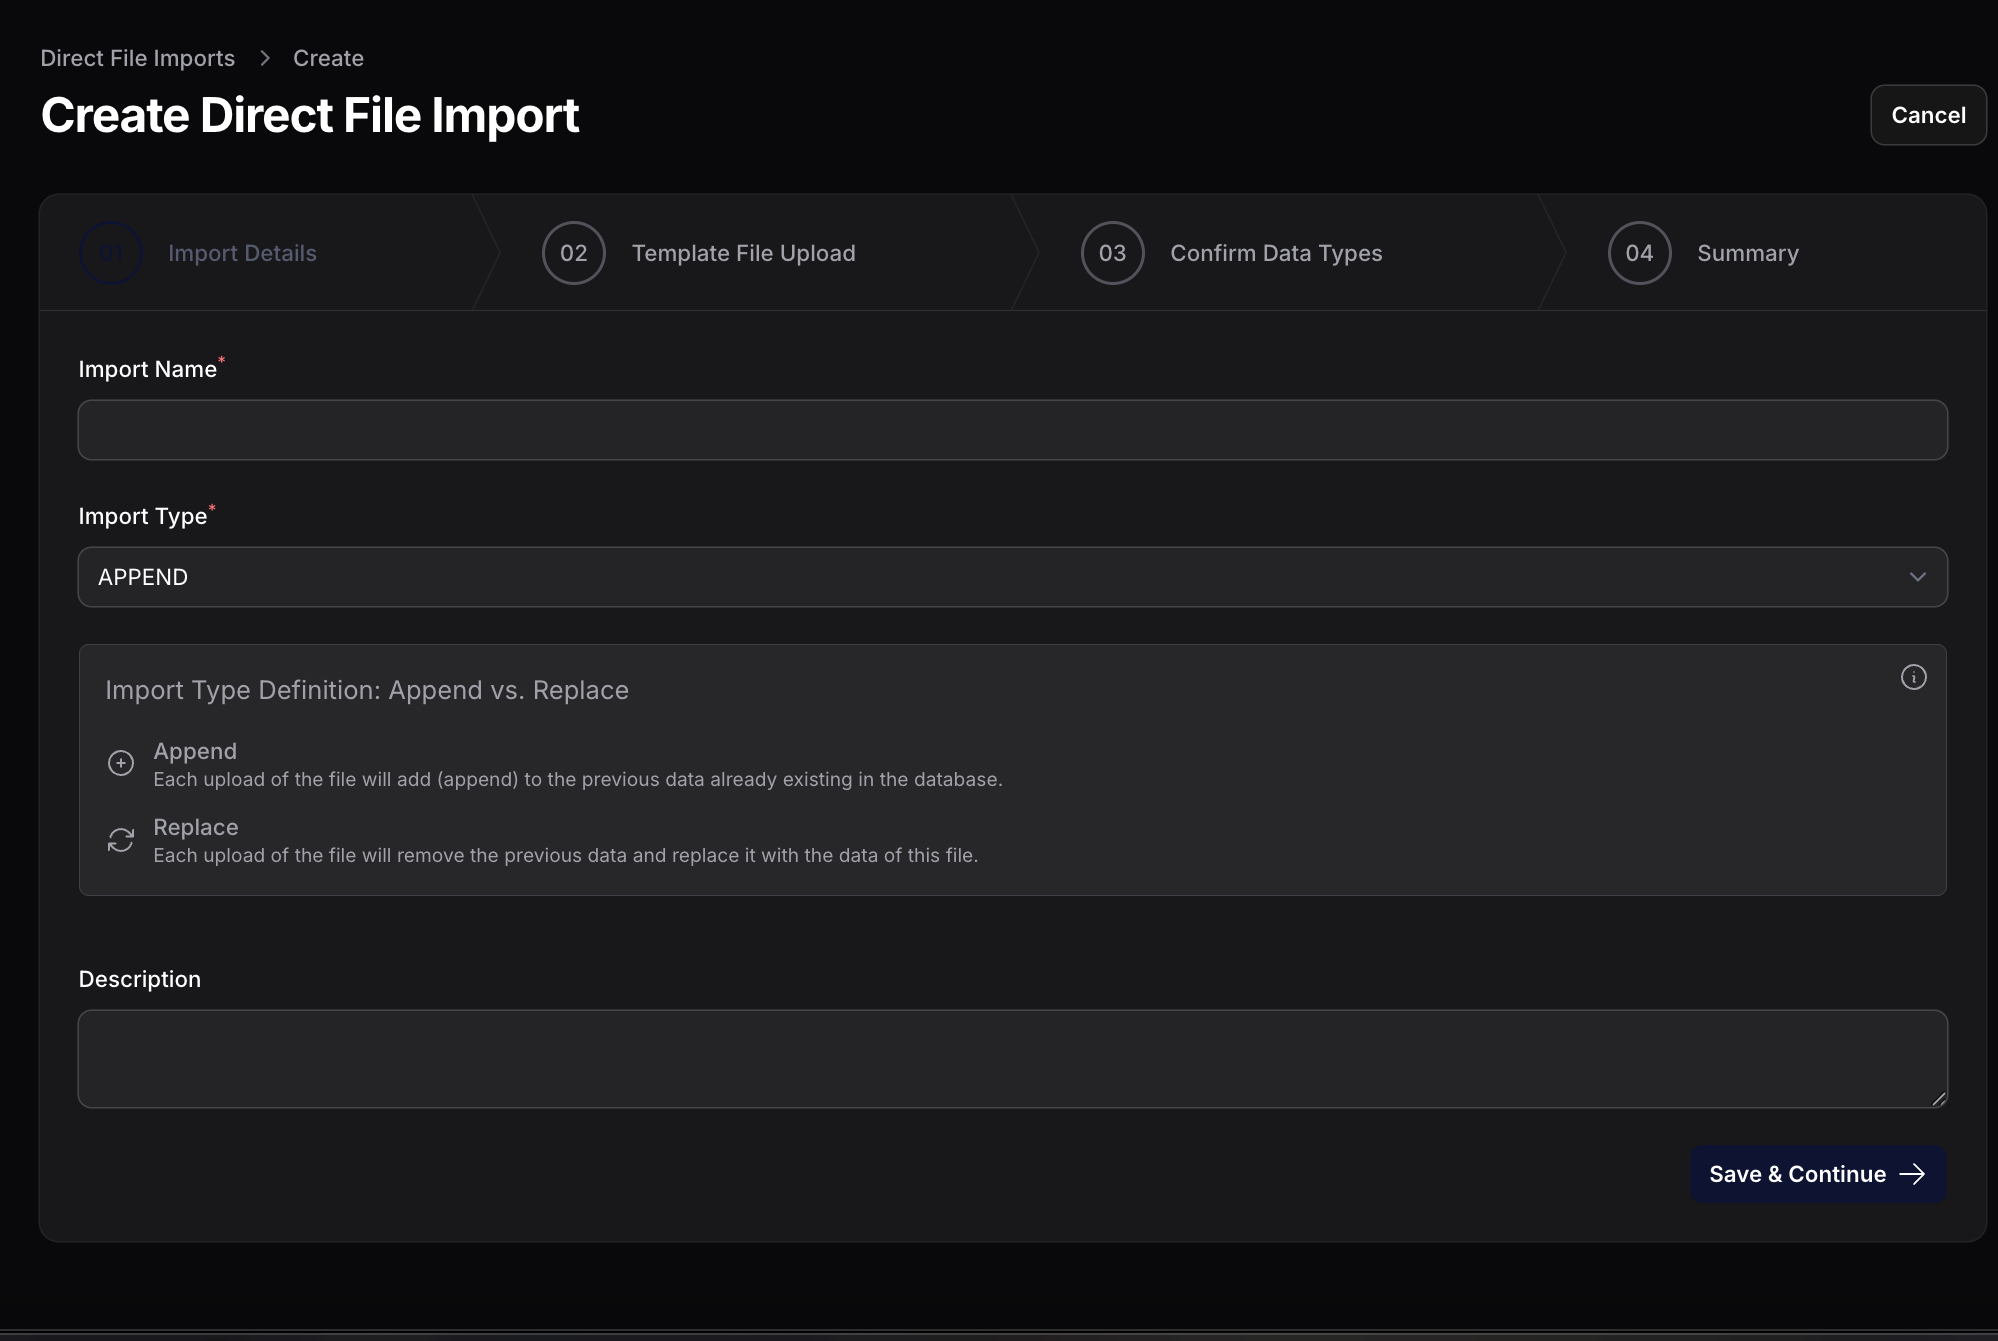
Click Save & Continue to proceed to step 2.
Upload Template File
Upload a sample file so Milemarker can detect the column structure and data types.
Tip: Make sure your file has headers in the first row. Milemarker will use these as column names.
Drag and drop your file or click Browse to select it from your computer.
Confirm Data Types
Review the detected columns and their data types to ensure accuracy.
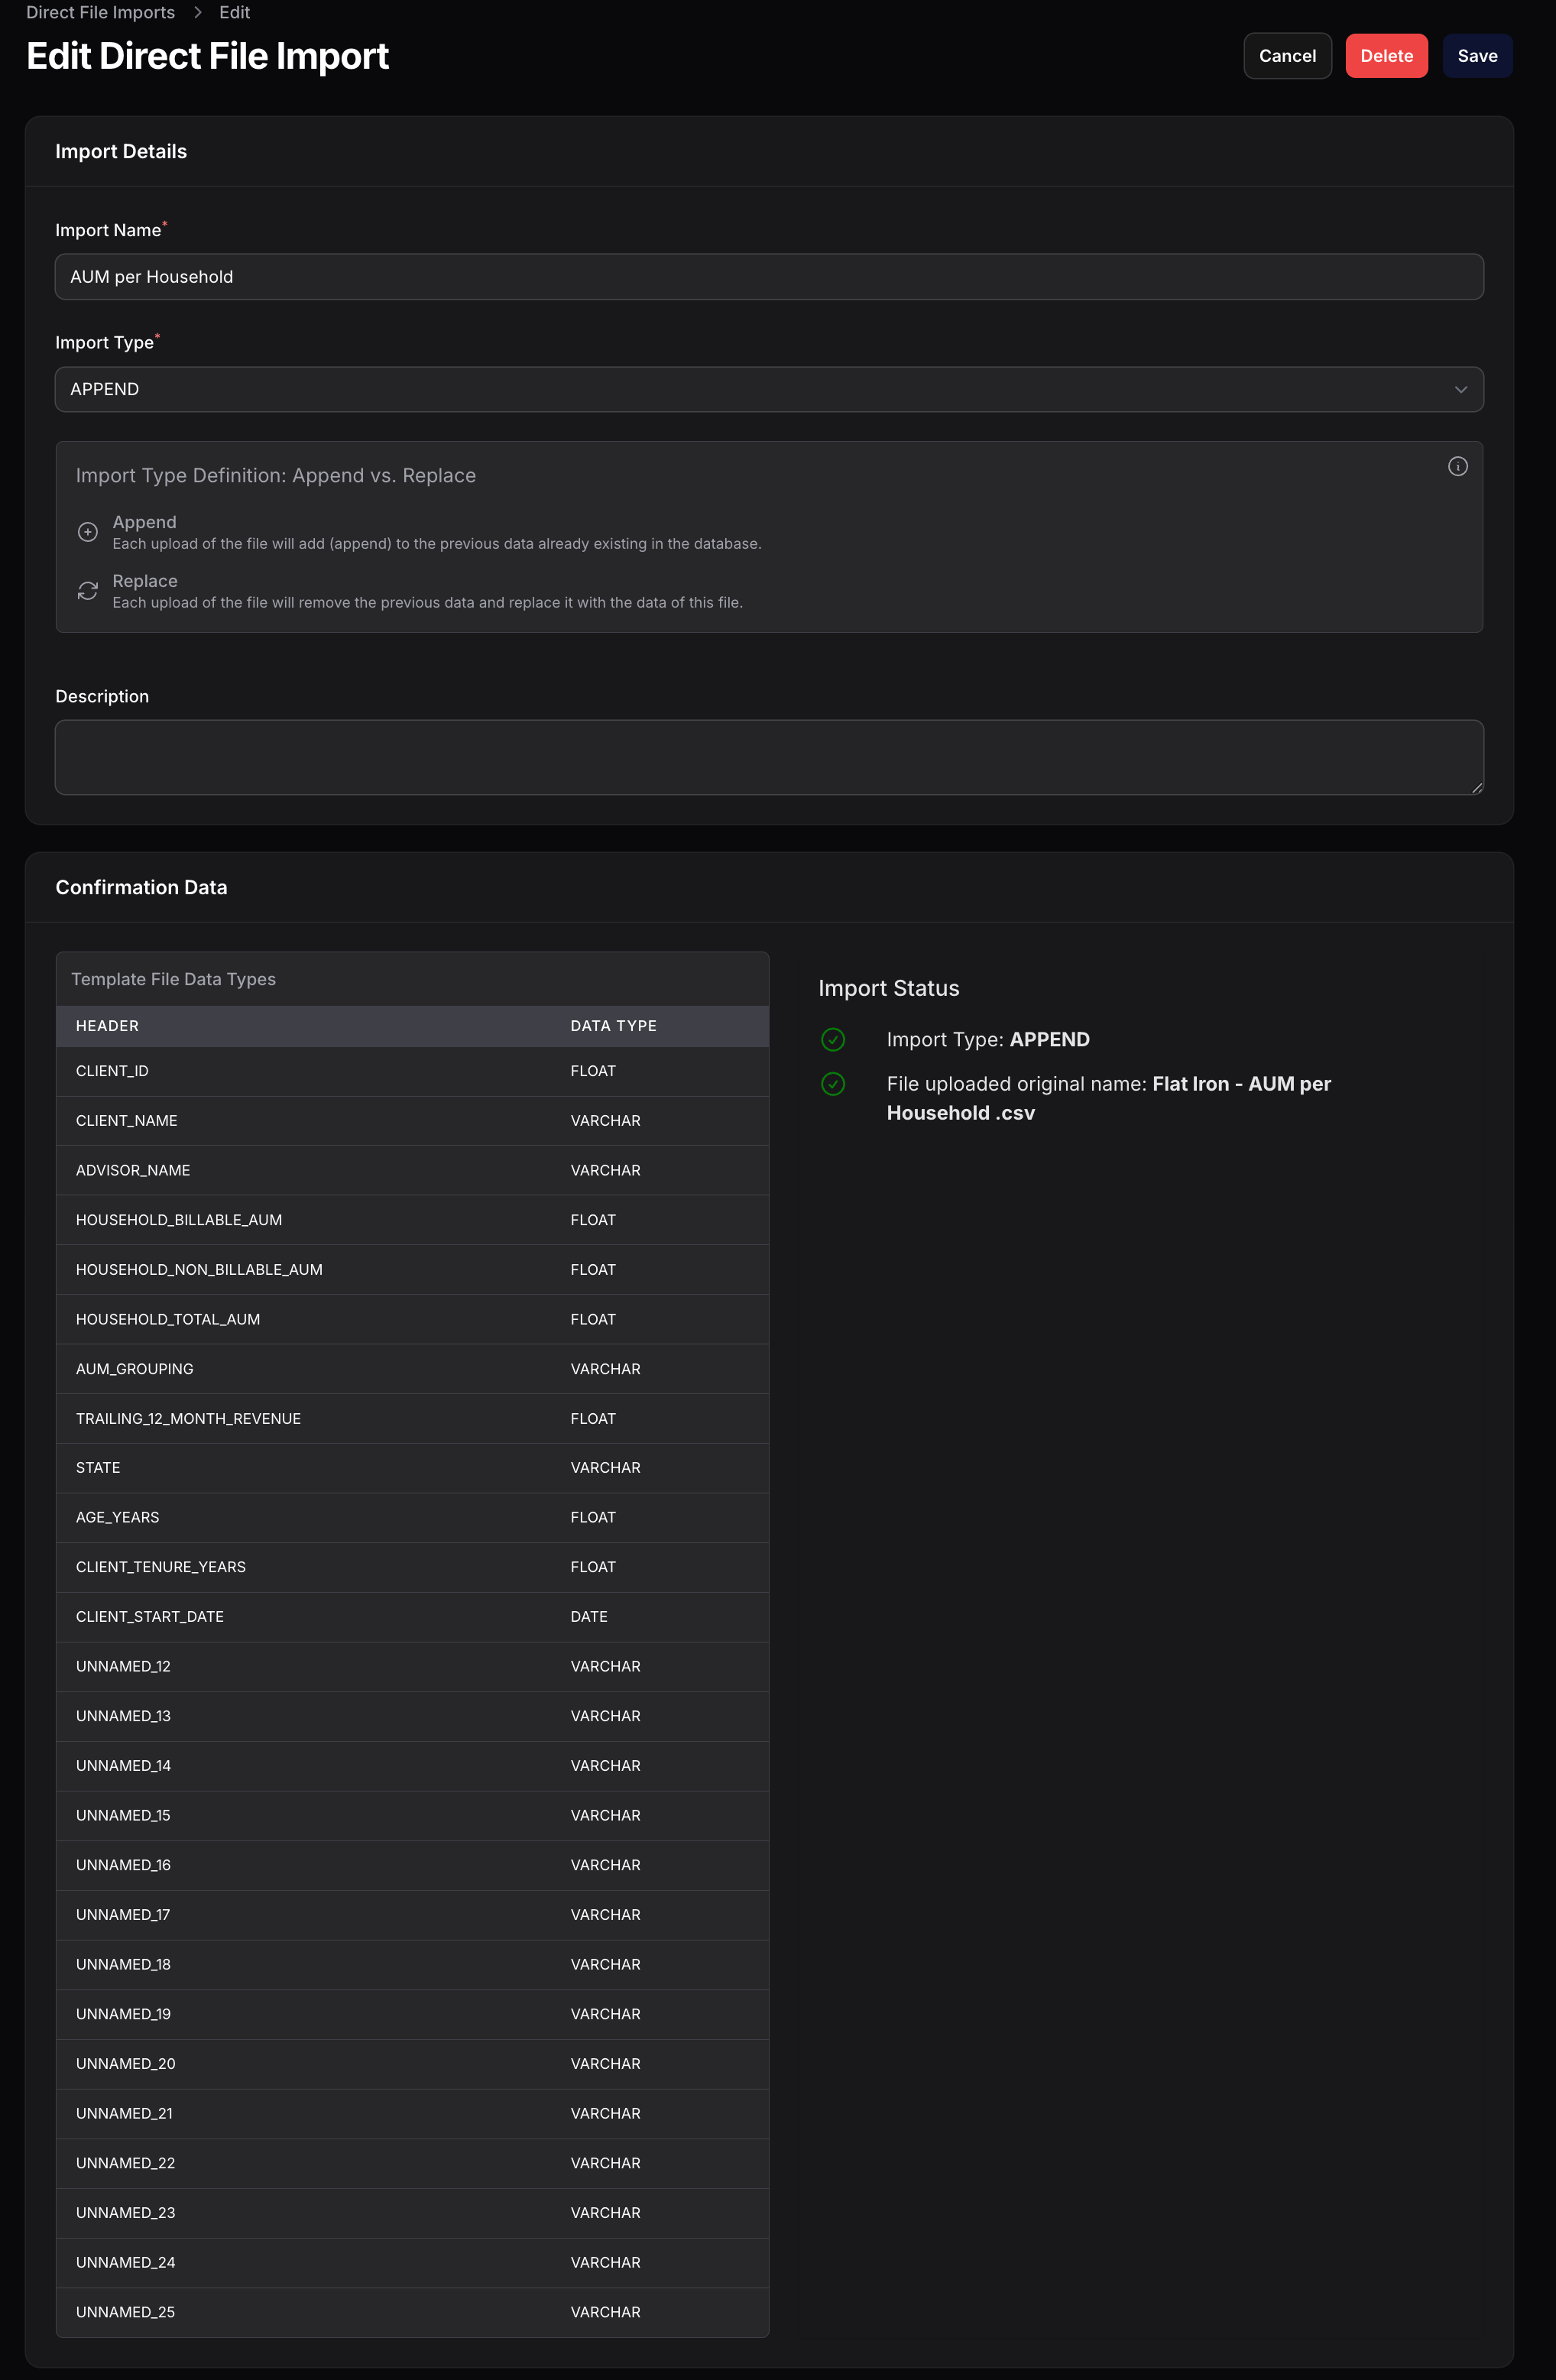
Milemarker automatically detects the data type for each column:
Text values
Decimal numbers
Date values
Whole numbers
Note: Columns labeled "UNNAMED_XX" indicate empty or missing headers in your source file. Consider cleaning up your file to remove unnecessary columns.
Review Summary & Save
Review all settings and click Save to create your import template.
Success! Once created, your import template is ready. You can upload new files to it at any time using the same structure.
Uploading Files to an Existing Import
Once you've created an import template, you can upload new files whenever you have updated data.
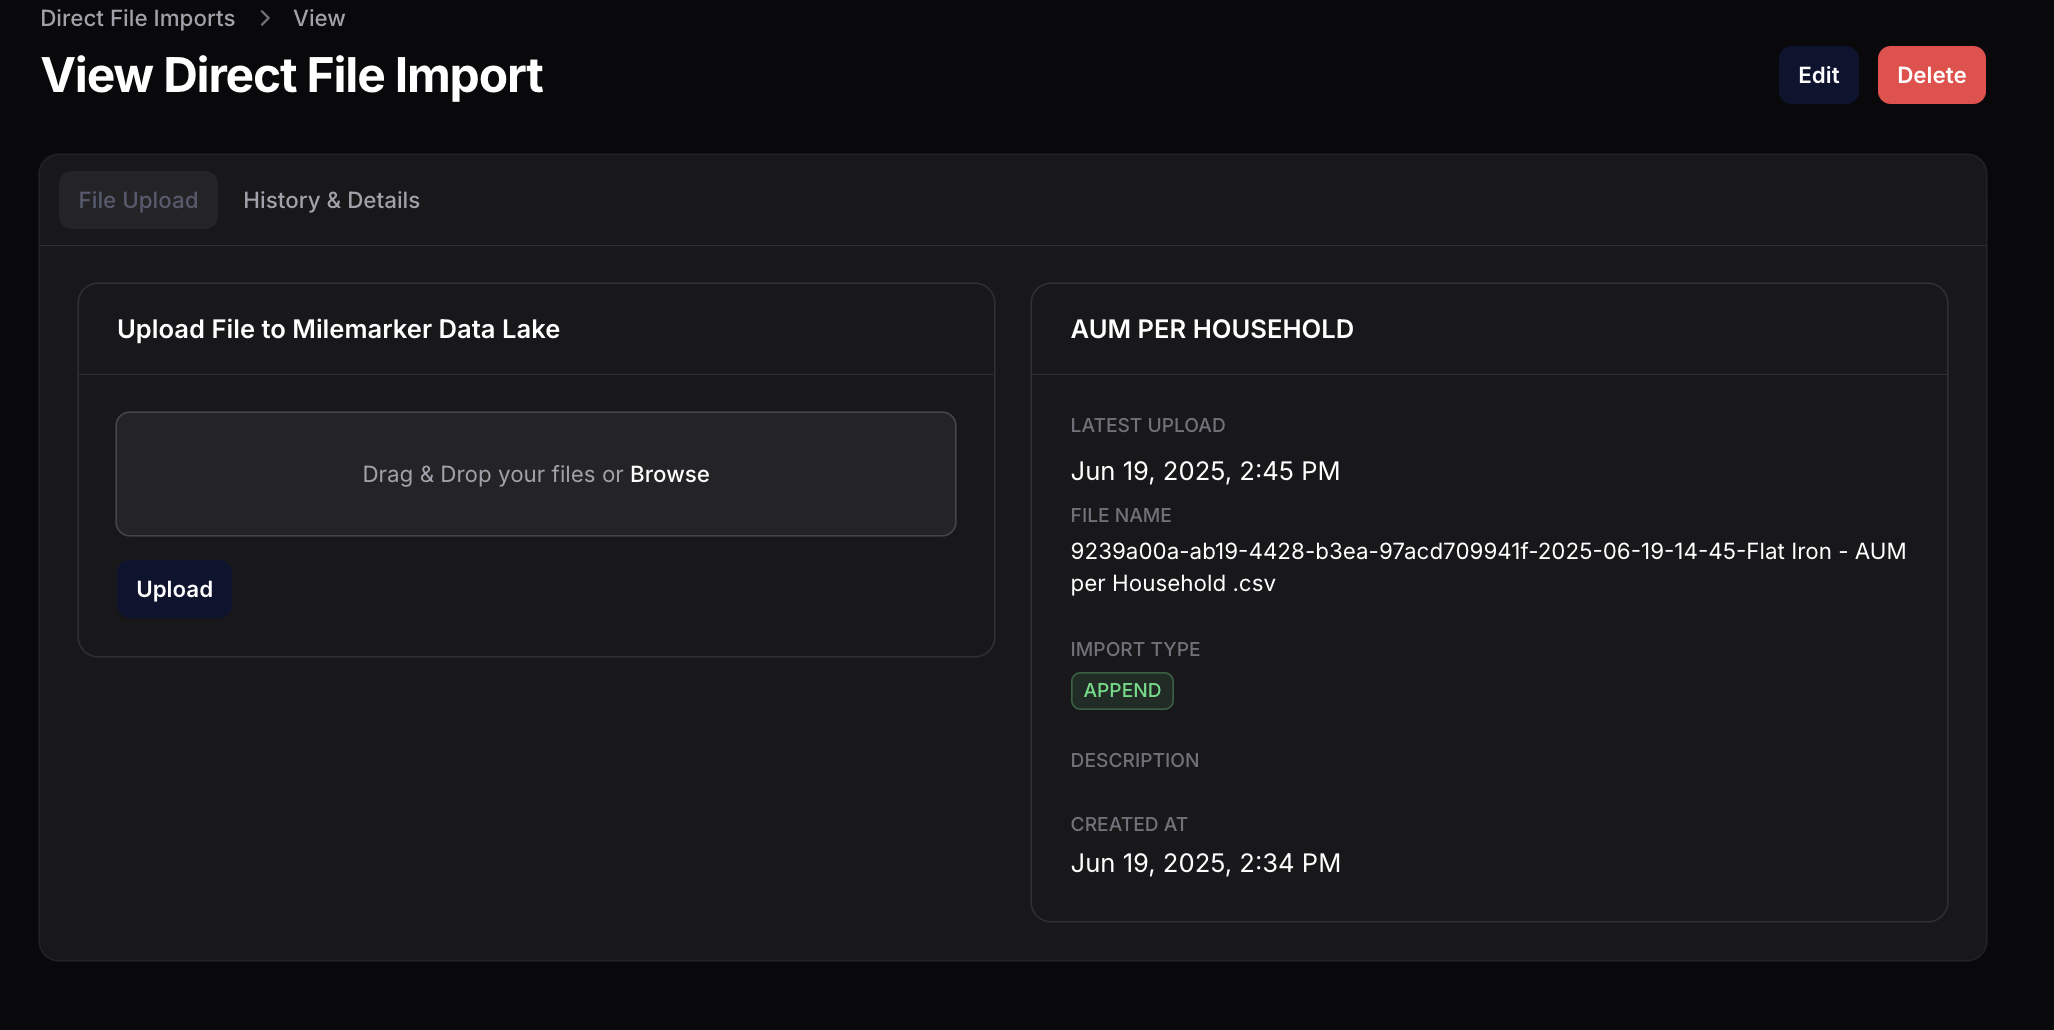
The right panel shows details about your import:
- • Latest Upload — When the last file was uploaded
- • File Name — Name of the most recent file
- • Import Type — Whether it's set to APPEND or REPLACE
- • Created At — When this import template was first created
Viewing Import History & Details
The History & Details tab shows you a complete record of all uploads and the technical details of your import.
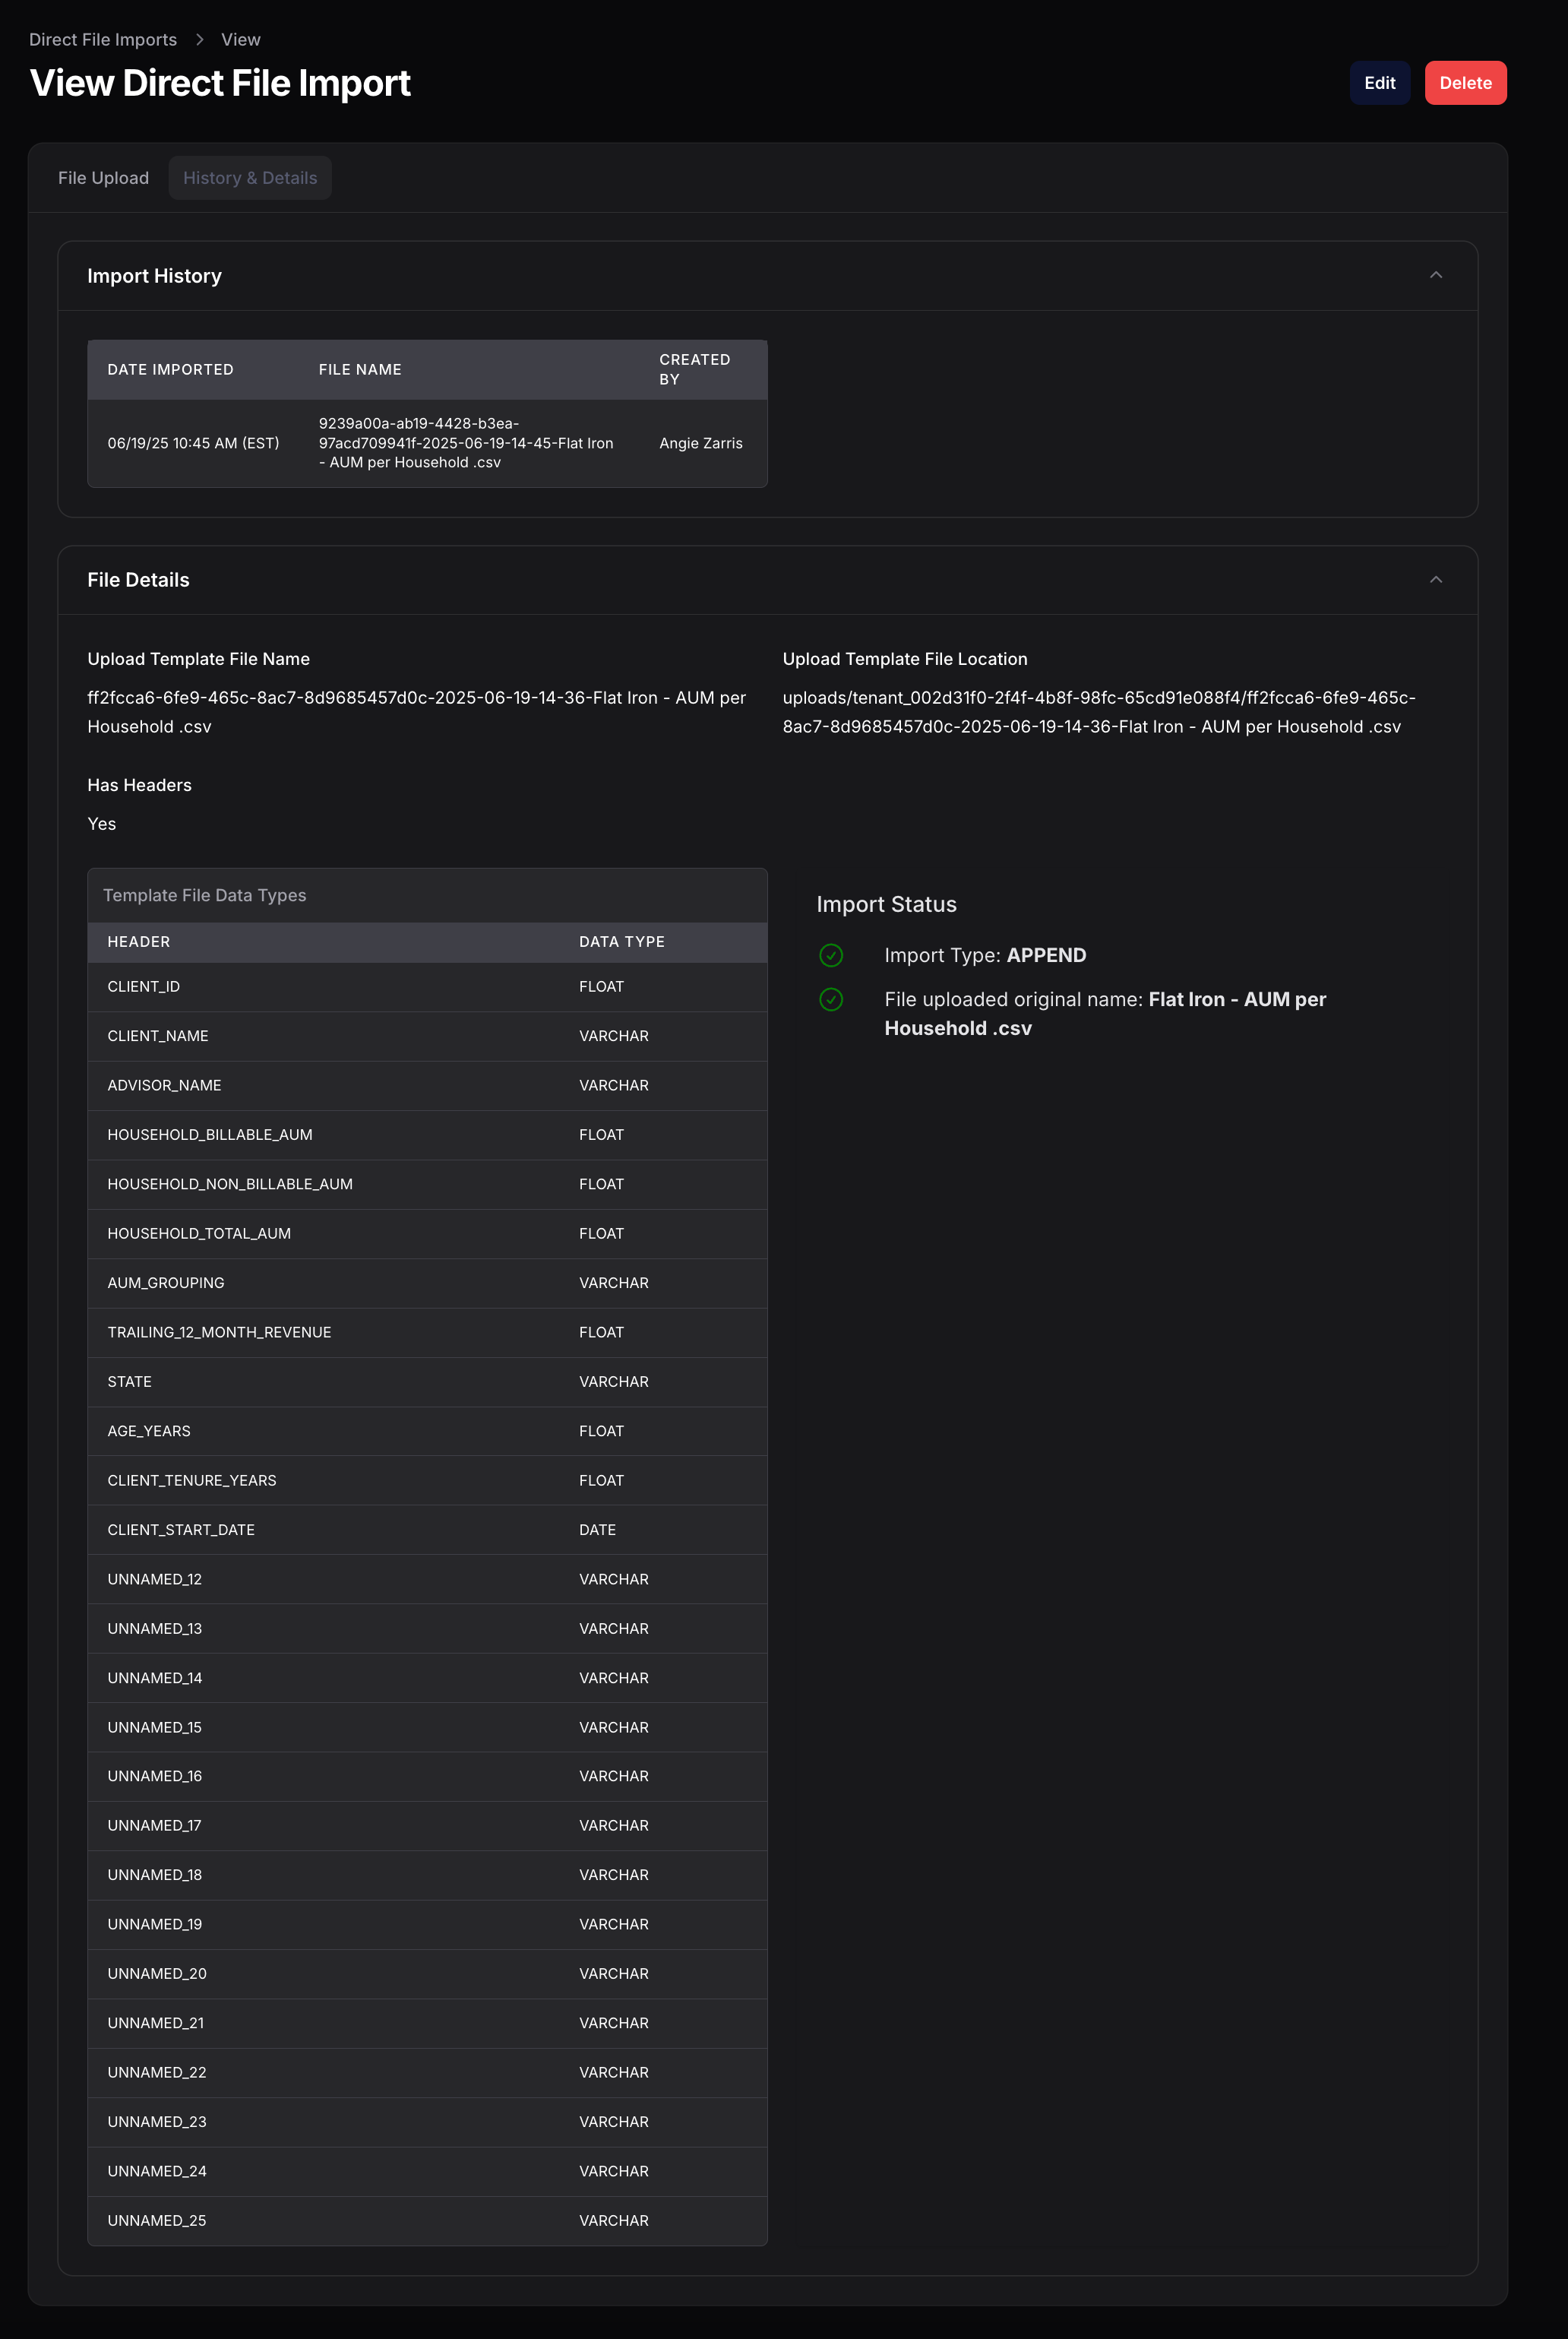
Import History
Shows a log of every file uploaded to this import, including:
- • Date and time imported
- • File name
- • Who uploaded it
File Details
Technical information about your template file:
- • Template file name and storage location
- • Whether the file has headers
- • Complete list of columns and their data types
Editing an Existing Import
Click the Edit button to modify your import settings. You can change:
Import Name
Update the display name to keep things organized
Import Type
Switch between APPEND and REPLACE modes
Description
Add or update notes about this import
Caution: Changing the Import Type affects how future uploads are processed. If you switch from APPEND to REPLACE, the next upload will overwrite all existing data.
Best Practices
Use Consistent Headers
Keep your column headers the same across all uploads. Milemarker uses these to match data to the correct fields.
Clean Your Data First
Remove empty rows, fix formatting issues, and ensure dates/numbers are consistent before uploading.
Choose the Right Import Type
Use APPEND for cumulative data (transactions, events). Use REPLACE for snapshot data (current balances, status reports).
Use Descriptive Names
Name your imports clearly so you and your team can easily find and manage them later.
Common Use Cases
AUM & Revenue Reports
Import periodic AUM snapshots or revenue data for tracking and analysis.
Client Data Updates
Upload updated client information that isn't captured by integrations.
Historical Data Migration
Bring in legacy data from previous systems during onboarding.
Supplemental Metrics
Add custom KPIs or metrics that you track outside of standard integrations.
Need Help?
Our team is here to assist with setting up your file imports or troubleshooting any issues.
Contact Support